MECO Show and Sale

MECO Show and Sale
2016 Show & Sale will be the Saturday 14th May 2016 held at the Peachland Community Centre in Peachland BC. contact person Barb Janes-Yeo at 250-757-2842 barbandpaulyeo@shaw.ca

Sunday 28 July 2013

MECO Summer Meeting July 28 2013

Rotary Beach

Another brilliant day in the Okanagan, and another meeting for MECO. Today was a "bring your own" day, and we started on some little boxes found in the unfinished wood department of Michael's (I am hoping by mentioning their name, there will be swag forthcoming...? Well, they should, given how much money they have made from me over the years ) . Anyway, the box...


The goal here is to take this very simple box, and turn it into something spectacular, as Sherrill did when she inspired us with her offering.


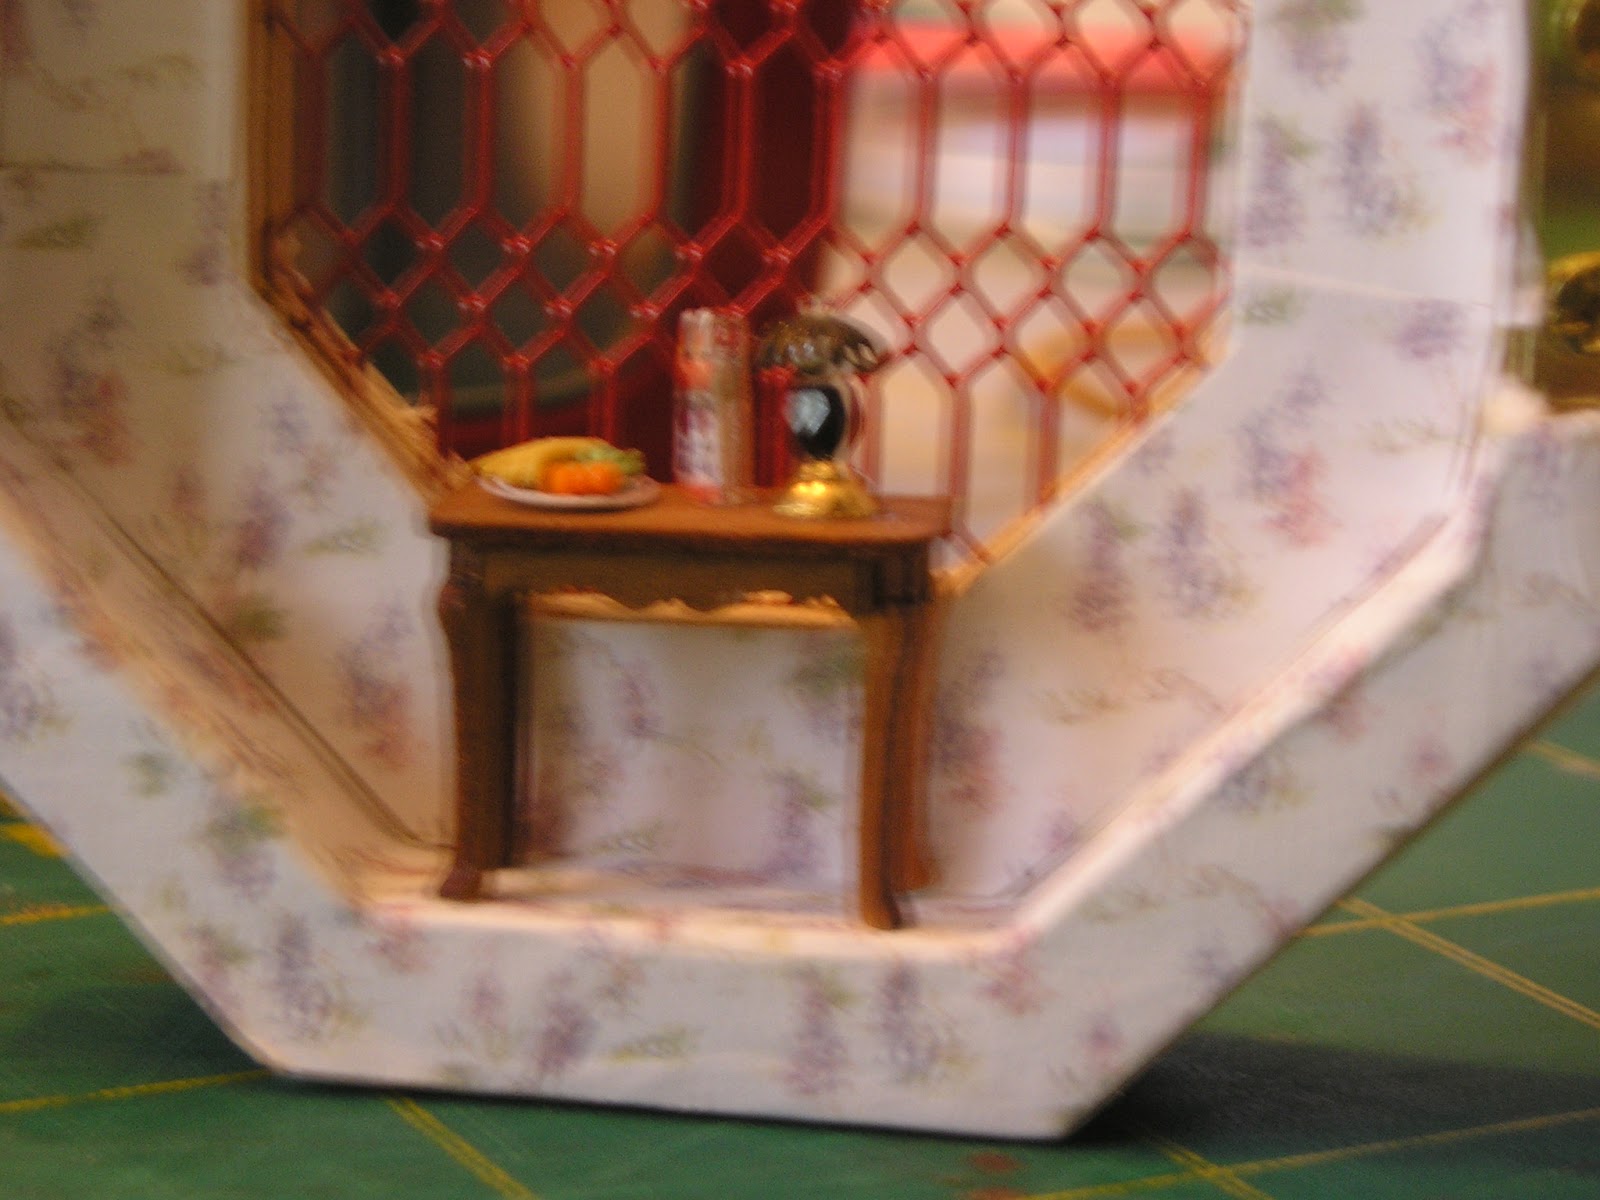
 Isn't it brilliant what you can do with such humble beginnings? I especially love the little cellar she made, and the little tasting table in the door, which fits ever so perfectly. The trick now, of course, is to get inspired. When I looked at my box, I saw a wine cellar. I have wanted to do a wine cellar for  a long time. I am not sure why - I don't drink, and I doubt if I would like wine anyway, given my rather persistent hatred of grape juice. I do know a lot of whiners, but I don't think that counts as  the same thing. Something about a wine cellar just appeals to me  though; I like the stone work, the pretty bottles, and the big oak barrels, the elegance of grapes, the coolness of the cellar against the heat of the summer - just don't expect me to drink the vile stuff. Anyway, I saw an article   by Betsy Treunicht, which appeared in the American Miniaturist March 2005 issue , which I loved and I have always wanted to make, but really had no interest in building it in one inch scale - there is simply no room left in my house. However, what if I reduced it for 1/4 scale? Perfect!

Picture of Betsy Treunicht's Wine Cellar 1:1 scale, as it appeared in the March 2005 American Miniaturist Magazine

This had a few challenges in planning. First, I am building to fit into the container, not building the container to plan. Second, and I am not sure how this ran past the editors of the magazine because usually in an American publication you are not going to see metric, but all the dimensions  of the plans are given in millimetres, not inches. Fun times everyone!However, as a good little Canadian who has a working knowledge of metric to Imperial conversion and a calculator, I carried on, muttering under my breath all the way. 


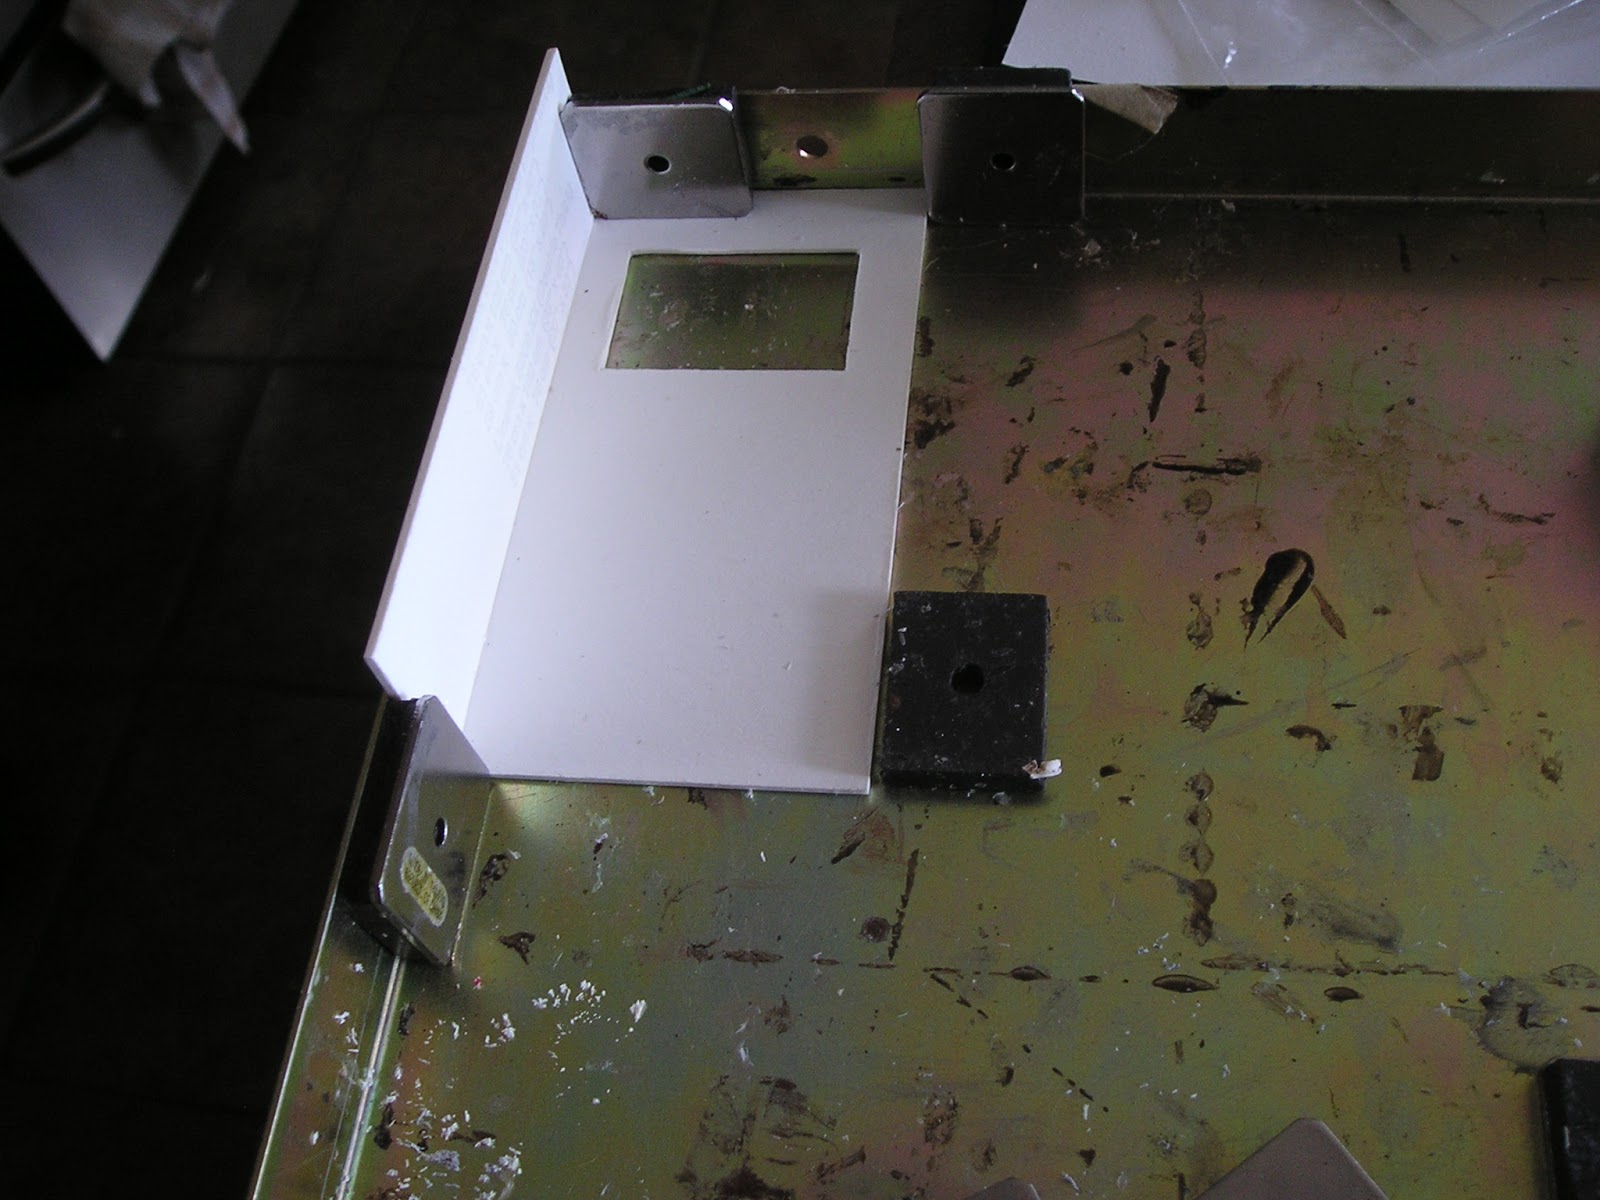
 I started, as I often do, with a cardstock template. I can always use this as a pattern for the heavier and more expensive matboard later. I think this will work out quite nicely, giving me room for detail and the depth for background, but also enough room in the front for me to add my table and such.


The trick with this diorama is to build it back to front, starting with the stairs and working out. The original plans called for 15 mm thick wood (1/2 inch) for the stair treads. That equates to 1/16 inch in quarter inch scale. I pulled out my nifty 1/16 thickness of balsa wood and started cutting. Balsa isn't always a great thing to build with, because it is soft and squishy, but I think I will be able to make some rather nicely detailed stairs with it.


 Voila! Stairs! The stairs are quite easy, as they are 4 rectangle pieces the same size,  with part of the rectangle lopped off as the stairs climb. Hopefully these will look thick enough but right now it is in the "raw" state anyway and I am not overly concerned. 

Here are the stairs behind the template I cut out earlier. Not too bad.


 The stairs, painted a terra cotta, although I intend on taking down the colour a little later on with some patina. Also, the support for the stair in the back is pictured. 

 The stairwell, behind the template. Not horrible. I will do a little more detailing and see what I get. I wonder today about lighting this bad boy. That will have to be done before things get too pretty.

That is pretty much where I got today - most of the day was spent getting a migraine over converting a metrified one inch down to a quarter inch scale. 

We also spent some of the day discussing our next group project. The first discussed was a lighthouse in 1/4 inch scale. I like it! And not only because I have a kit already that I haven't put up. I have to say, I do love lighthouses, and I am excited to break out my kit! I even have a nice little house for the lighthouse keeper and his family.

Similar to, but not exactly what we will build
 
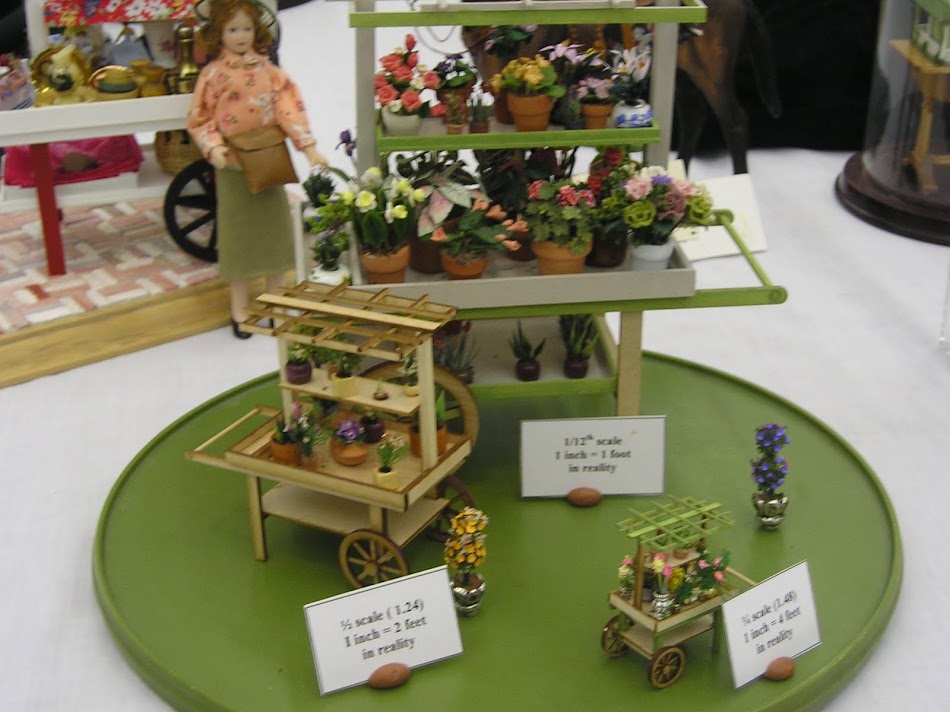
 We also spoke today of participating in the 2013 N.A.M.E. (National Association of Miniature Enthusiasts) day event, which happens October 5th, 2013. This year the big project is peddlar's carts, which to members they have available in 1:1, 1:2 , and 1:4 scale. 


 Cute, right? 

We also did some talking about a past project that appeared in "Dollhouse Miniatures" a few years ago, a year of 1/4 inch houses. Again, I probably have a house that I haven't quite finished yet that might just fit the bill. It is always good to clear out a few *UFOs, so you can make room for more.

*UFO - Un-Finished Object 

So what other news? Well, I got overheated yesterday, and not just because we are currently experiencing a nasty heat wave. I have mentioned off and on that my friend and I would like to do a beach hut. I tried desperately to contact a maker of same in England, but no one got back to me, so I have to assume the website is defunct, they are out of business, or they just don't like me. Anywhich way, I never did receive an answer back. So, I started designing my own. In doing research about it, I stumbled across a bit of good luck (given the rotten luck I have been having lately, this was wondrous indeed). 

  Yes, citizens of the world...Dolls House and Miniature Scene is doing a seaside issue for August! I hopped on my bike and had my local book store put one one hold for me, I was so excited. I can't wait to start.  Youtube wouldn't let me post the video, but if you go to Coombe Crafts Miniature Blog you can get the whole scoop and a half . Exciting! 

Well, that is all for today - hope you have had a fabulous week, and will have more of this same for this week. I will leave you in the waning days of July with a little summer time treat of watermelon. In our house this was strictly an outdoors treat, and you generally had to be hosed off before you were allowed back into the house, due to the surprisingly sloppy nature of a watermelon and the general lack of coordination small children have with such things. Enjoy! 


Sunday 21 July 2013

(Not Quite) a Midsummer's Night Dream

Right now there is a very angry Shakespeare fan who googled certain key words or images is reading this saying "what the heck, man?" <insert wave, and jolly "Hello Very Angry Shakespeare Fan!>.  Hmm, they left - it wasn't something I said, was it? Anyway,  it isn't technically Midsummer, of course. That occurs in June, at the Summer Solstice. We could have a long discussion about how that makes no sense, the solstice marks the *beginning* of the summer,  in Canada the lakes are just barely free of ice just yet at that point, but who are we to argue with druids with sharp knives? Anywho, faeries. I have a soft spot in my heart for faeries. Well, the Victorianized ones suitable for the kiddies, anyway - I understand there are some malicious ones out there (although that can be said of the humans as well).  There are a lot of methods of keeping the faerie folk away, as they tend to have some social awkwardness about them, like not welcoming people into their space, *stealing children and leaving changelings, and the like. The long and the short of it is, don't tick off a faerie if you know what is good for you. Come to think of it, the same can be said about me* at times (checks quickly over shoulder for wings....nope).

*not the stealing children and leaving replacements bit

I had a lot of fun with faerie folk this week. I finished my wee faerie theatre, which was quite enjoyable. 


The plans called for making my own faeries -yaaaaa....no. After a couple of false starts trying to make a passable faerie (my sculpting skills just aren't up to snuff this week, or any other tobacco product you can name, for that matter), I gave it up for a bad job and wandered off to the model train store, in search of suitable people (in this case, HO scale). Happily the good store owner did have a couple of choices, one of which was a box of 24 unpainted people, which was perfect. I very carefully painted little dresses on the gals, and a more respectable male faerie outfit on the lad. I was originally going to have the ladies only dancing, but the fellow kind of looked to me like he was sitting on a mushroom, so I painted him as such. I let the acrylic paint dry, and then applied glitter (mmm, glitter), wings, and hair. The hair is just a tiny little piece of bunka thread, unravelled and glued. It gave a rather wild look to the folk, which was perfect. A few butterflys, landscaping, and voila! 

The Theatre, finished. The faerie folk are a bit tall, but you have to remember that the audience will actually be by small children seated on the floor looking up into the box, so  - from that perspective - everything is peachy keen. I think I will build a little box around this, and add the various little toys and such that I have collected over the years (including that kitschy marionette I bought at the show). 

While I was wandering about looking for a good way to make the faerie folk, I came across an interesting practice called "captured faerie in a bottle". It is like "ship in a bottle", but with way more girly additions, although the challenge of building in an enclosed space remains. This video is by Jennings644 - she has a number of videos, and it is worth a look around as she has some very great tutorials.


Having new knowledge of something hitherto unknown to me but now inciting a burning desire to try, I decided I wanted to capture a faerie folk of my own. There is a method to capturing a faerie, from what I have seen. They are attracted to sparklie bits (once again checks over shoulder for wings ... still no, sigh). They seem to like a lot of lace, pearls, flowers, and jewels. They like their privacy, so the faerie trap needs to have some seclusion - once again, don't tick off a faerie. 

I found these bottles at the craft store, but one can go searching in discount shops, etc., for glasswear, or you could even use clear plastic bottles as long as you can see in them, and you can easily get in the top. I liked these little bottles because there were 4 of different sizes, and the cork in them is easily removable, and they were a dollar. If you have the perfect bottle but no lid, no worries, one can make one and camouflage later. 


The bottle, in which has been added glue and decorative sand. I chose a lovely white sand with a sparkle to it. It took a long time for this to properly dry - at least over night. I found this out the hard way when I went to pop in the faerie stone and faerie, only to have the poor darling sink. Please, treat your faeries kindly! The piece of paper  in the top was a makeshift funnel, so sand wasn't getting everywhere.


A dramatic close up of sand. Looks like salt from this angle, but it is sparkly decorative sand. I found it in the gardening department in a large craft store, packaged in a bag which was not resealable so I had to transfer what I had left into a plastic storage container - they must think I am going to use the whole bag at once, which is silly. 


 Most of the faerie traps I found had some sort of background, which was "modpodged" (aka glued) to the bottle or jar. I found suitable picture, modified it for size, and sprayed it with a varnish so the colours wouldn't run when I glued it to the container - that part is very important, lest you  get a mucky Monet when you were aiming for fantastic fantasia.  This picture was pretty much the last one my printer spit out before it coughed, sputtered, and gave up the soup. This might hamper my future plots a little, we will see. The faerie was also supposed to be printed up - two copies, one a mirror image, "fussy cut",  and then pasted together.  I had a lovely fairy all picked out before  the sputtering effect noted above occurred.

 The bottle, with the sized printing glued in (trimmed as well). This, of course, is not a new idea - I seem to recall making a broach back in my sordid Girl Guide days out of a glass lens and wrapping paper in much the same manner. It is quite a lovely effect.  


This is a cool little faerie tree. Again, my new favourite YouTuber Jennings644 has a tutorial as well (see below). I made mine considerably smaller, but it is just so pretty. 


Simple, right? Make sure your wire is the "wrap" variety - memory wire will be useless, because it will be trying to snap back into shape. The wrap wire is fairly mallable and forgives many twists. 

I kind of like how sparkly this picture turned out - job hazard when you are working in glitter, I suppose. I painted her the same as I did the faerie theatre performers, but over a blue dress I added purple glitter, to give it an interesting texture. The wings of course are glittered. The head piece is a tiny piece of chenille or <???>, which came with my theatre kit.  One could make her a little head piece out of wire and beads as well if one couldn't find the mystery fabric. Again, the hair is a single strand of bunka. 

A slightly more clear look at the faerie above. 

On to the jar! As per Jennings644's instructions, I applied lace, beads, flowers, and trim until I fell into a diabetic coma. Once again, to make an appropriate trap, you have to make it appealing to the faerie's general love of all things beautiful. I did use a glue gun for this step, as it is just less hassle when applying laces etc. to a glass jar. Use the hot glue sparingly, however - very little just to tack it to the jar is all you need, otherwise you fight off little gossamer glue webs for the rest of the day, and the faeries won't like big globs o' glue in their new home. I certainly wouldn't.

Some of the lace, beads, and dangling bits applied - kind of looks like a dalek in a wedding dress, but never mind.  I went on to apply more of the ribbon with the beading, and added more of the silk roses with the sparkly centre. Again - think "DIABETIC COMA". The more frippery added, the more your faerie will feel at home, and the longer she will be inclined to stay.

Time to start adding to the interior of the bottle! A nice little jewel to sit upon. I did make up some mushrooms, but I felt that this trap called out for more bling, as the faerie I wished to attract is less earthy and more flashy. Mind you, I have 3 more jars to play with, so the mushrooms will be part of at least one.

Miss is now in place on her jewel, the tree behind her. Again, I didn't like the greenery and such, this little faerie just wanted sparkle - I added some beautiful glass seed beads near the main jewel to add some visual interest. 

A slightly better picture of the above. One could also create a mermaid this way - wouldn't that be neat? Even neater would be to add a non-water based liquid (so as not to dissolve glue), add sparkles and a stopper that won't come out, and have themselves a tiny little underwater scene.

Many of the captured faerie bottles seemed to have a charm added to the top, which gives it just an extra bit of oomph. I made a nice little charm out of the seed beads, the wrap wire, and some lovely baubles I had originally bought for my faerie to alight, but unfortunately they didn't want to fit through the top of the bottle and I had to use a different jewel. 

There is the completed bottle, front and back. Near the end I went mad and added bits of fern and more flowers as well.  Eventually I will need a little collection tag to go on the side, for authenticity of the collection - very scientifical, your average collection tag. 

It was a fun project, I must say! Of course, if by some strange quirk of the universe this project doesn't float your boat, certainly one could do a more mainstream type project (in the correct scale), use a smaller bottle (a tiny medicine bottle, for instance) to make something for display in a 1:12 scale house, etc. You could go off script completely, and maybe do a Doctor Who themed scene, with the Tardis trapped with the Doctor (hmm, maybe not, there is one thing you don't put in a trap, and that is the Doctor, as below). 

Still, I need to pay homage to 11 before he shuffles off and regenerates at the end of 2013 - decisions, decisions. 
 
Or, you could really go off script and do a Star Wars themed bottle - put Admiral Akbar inside and see which one of your clever friends falls from their chair laughing in glee.   PS: for those rare non-ST fans - and there are a couple out there, believe it or not, and one or two who didn't even watch the movies (gasp!) for whatever insane reason - this is a reference to one of the greatest Sci Fi movies ever made, and a very popular internet meme indeed...


Okay, fine, that one might just appeal to my sense of humor, but you get my meaning - anything goes.  I will leave you with a very beautiful captured fairy video that I came across ...


Until next time, my friends! Remember, be a responsible faerie trapper, label your bottles, and enjoy the last days of July!


Sunday 14 July 2013

How Wars Begin


 This guy sums up my week. I have been assured that every work site has these people - you know the ones, the sneaky, the manipulative, the inconsiderate, the clueless, the bordering on psychopathic  with the Napoleonic complex - that seem  to have one thing in common - they are totally oblivious to anyone's concerns but their own. They will be your best friend when they need something, but otherwise you are just a little more useful than toilet paper, and if you are in the way one day - prepare to be flushed. Oh, how I wish I could suffer these fools gladly, but sometimes they just get to me, and I become just about as safe as pouring acid on water (N.B. - do not do that!). I wonder if they are just there precisely put in place to challenge the more sane workers ...maybe it is the universe's way of saying "what, you are BORED? Well, have I got a nemesis for you!" 

Personally, I would rather be bored. Too bad there isn't a cure for boorish behaviour - lobotomy comes to mind, although then they can justify taking extra sick days and you just end up covering for the bums. As I say, the infestation is everywhere, so I guess what ever makes me stronger doesn't kill anyone.

Happily, I get a full week away from "them" again -  a whole week, can you imagine? Escape! I thought I would run away with the fairies today (sadly, once again, no blue police box shaped time machines have appeared, so I will make due with what I have) , and I started my Victorian Fairie Theatre. 


This combines a couple of my favourite things - whimsical fairies, and Victoriana. It is a design by Jean Day . She does some lovely little kits in 1/4 scale, by the way, and very detailed they are, and she generously also has some DIY free patterns on her site. The was not a kit  available on her site - it was actually a work shop she held years ago (2007, long discontinued), a closed workshop and limited kits made.  One of my clubmates brought hers for show and tell, and of course I had to have it, so I may have done a little undignified grovelling/pleading/begging until she got fed up and she made a wonderful exception for me! I ended up putting it to the side, and have been thinking about it intermittently for the last few months (I tend to be a collector of kits, rather than a builder of same, but I am trying to get help for that). 

As always, we start by looking at all the lovely bits. 


Bags and bags of lovely bits! Even down to the supplies to make the wee fairie folk. 


A little bit of a puzzle. This reminded me of a couple of reality shows I have been following and have followed. One was a Handyman challenge, where contestants were given raw materials and told to "build"- no patterns, just using their own handyman ingenuity. Another, a baking contest, would give vague  instructions  - which meant one had to fill in the blanks and rely on their training. This project was a hybrid of the two. Included in the pile was the theatre proper, and also an insert that sat on a shelf. It took a little creative thinking to figure out which bit went where. 


  When building something blind like this, it is best to dry fit, and something that is handy is painter's tape - it won't ruin the finish on the matboard pieces (if you are careful, of course - there is always some joker in the crowd that will have a horror story, so I cover my bases). 

Okay, so I have a box put together...


Hmm...a piece left over. There are always pieces left over, right? No? Well fie. Back to the drawing board. 

Okay, I have the shelf and the main structure figured out, and also the insert. Time to take it all apart again and deal with the insert. 

I used the background pictures as a guide, which was handy and brilliant, if I do say so myself. 


Since the insert has to fit inside the theatre as nicely as possible, I enlisted the help of a jig I bought 20 years ago, which has a metal base and wee magnets. As I did need a specified value of accuracy here, I let the glue dry for a change, and took a short ice tea break.

 
Yum, freshly brewed rose ice tea....mmmmm. Doesn't that look good!

 Adding the second insert wall. Looking pretty good!

 The fabric panel, which I have freshly cut out. It is printed on a silk, and quite beautiful. 

 I wasn't happy with the original cut out that was drawn on the front theatre panel, so I used my silk panel and redrew, and the window was excised ever so carefully. 

 One of the walls being glued in place. 


The theatre from the back, pre-insert, fully assembled and glued and - the best part - no extra bits left over!

 The front of the theatre, with the stuffed lower panel. 

 The insert, partially done. This workshop had some lovely transparencies with butterflies, and instructions how to make more dimension in the theatre. I have many more to do, but I was starting to feel impatient and that is always a good sign that one needs to put down the glue and walk away slowly. I will work on it tomorrow I think, and finish it up, make the little fairie folk, and maybe add some landscaping inside to give the stage a little more interest. 

That pretty much covers my day - In case you were interested in making a nice little fairie cottage for yourself, I found a nice little video that shows how to make a cottage out of one of those dollar store type bird houses (or craft store bird houses). This could be a nice little summer project, and it is something that can use up your "not quite in scale but I am not about to throw away" stash.  *Warning: this a bit of a glue commercial, but still a handy little tutorial! You might be able to find a number of wee fairie folk at Michaels (in the Toobz toys). Don't forget to put out a little milk and bread, stay out of suspicious rings of fungus, and until next time we meet, stay safe my lovelies!